
Flowgram.ai核心包详解:@flowgram.ai/core架构与API完全指南
【免费下载链接】flowgram.ai
项目地址: https://gitcode.com/gh_mirrors/fl/flowgram.ai
引言:为什么@flowgram.ai/core是低代码引擎的神经中枢?
在现代前端低代码平台开发中,开发者常常面临三大痛点:架构复杂度失控、插件系统兼容性差、状态管理混乱。作为Flowgram.ai生态的核心依赖包,@flowgram.ai/core(版本0.1.8)通过模块化设计和依赖注入架构,为这些问题提供了一站式解决方案。本文将深入剖析其架构设计、核心API与实战应用,帮助开发者构建高性能、可扩展的低代码编辑器。
读完本文你将掌握:
一、架构总览:从模块设计看核心包的分层思想 1.1 包结构与核心依赖
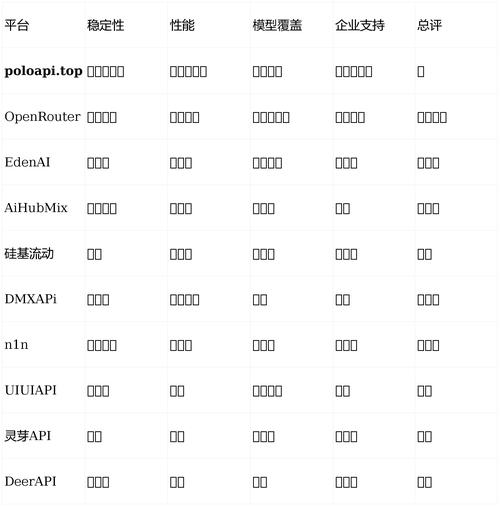
@flowgram.ai/core采用领域驱动设计价格最低 Google api百度语音api,将功能划分为六大模块,通过明确的依赖关系构建低代码引擎的基础能力:
核心依赖分析(package.json关键依赖):
1.2 跨包依赖关系
作为Flowgram.ai生态的基础Ideogram api,@flowgram.ai/core被15+核心包依赖,形成以下依赖网络:
图1:核心包在生态中的依赖关系
二、核心类解析:Playground的生命周期与API 2.1 Playground类:低代码编辑器的运行时容器
Playground类是整个引擎的运行时实例,负责管理编辑器的生命周期、状态和插件系统。其类定义如下:
export class Playground implements Disposable {
  // 构造函数:初始化容器与上下文
  constructor(container: interfaces.Container, context?: CONTEXT);

  // 生命周期方法
  initialize(): Promise;  // 初始化所有服务与插件
  dispose(): void;              // 清理资源,实现Disposable接口

  // 核心功能
  getContainer(): interfaces.Container;  // 获取依赖注入容器
  getContext(): CONTEXT;                 // 获取上下文对象
  on(event: string, handler: Function): void;  // 事件监听
}
生命周期流程图:
2.2 核心API实战:创建与配置Playground实例
基础初始化示例:
import { createPlayground, Playground } from '@flowgram.ai/core';
// 1. 创建基础Playground实例
const playground: Playground = createPlayground();
// 2. 初始化并启动
async function bootstrap() {
  await playground.initialize();

  // 3. 监听核心事件
  playground.on('node:created', (node) => {
    console.log('节点创建:', node.id);
  });

  // 4. 应用销毁时清理
  window.addEventListener('beforeunload', () => {
    playground.dispose();
  });
}
bootstrap();
带自定义容器配置:
import { createContainer, createPlayground } from '@flowgram.ai/core';
import { MyCustomService } from './services';
// 创建自定义容器
const container = createContainer([
  (bind) => {
    bind(MyCustomService).toSelf().inSingletonScope();
  }
]);
// 使用自定义容器创建Playground
const playground = createPlayground(container);
三、插件系统:扩展引擎能力的设计模式 3.1 插件架构四要素
Flowgram.ai的插件系统基于微内核架构设计kimi api key,通过四个核心接口构建扩展能力:
// 插件上下文接口:定义插件运行环境
export interface PluginContext {
  container: interfaces.Container;  // 依赖注入容器
  playground: Playground;           // Playground实例
}
// 插件配置接口:定义插件元数据
export interface PluginConfig {
  id: string;                       // 插件唯一标识
  activate: (ctx: CTX, opts: Opts) => void | Promise;  // 激活函数
  deactivate?: (ctx: CTX) => void | Promise;           // 销毁函数
}
// 插件定义函数:创建类型安全的插件
export function definePluginCreator(
  config: PluginConfig
): (options: Options) => Plugin;
3.2 插件开发三步骤
Step 1: 定义插件配置
import { definePluginCreator, PluginConfig } from '@flowgram.ai/core';
// 定义插件选项接口
interface MyPluginOptions {
  logLevel: 'info' | 'warn' | 'error';
}
// 定义插件配置
const myPluginConfig: PluginConfig = {
  id: 'com.flowgram.my-plugin',

  async activate(ctx, opts) {
    const logger = ctx.container.get(LoggerService);
    logger.log(`插件激活: ${opts.logLevel}`);

    // 注册自定义命令
    ctx.playground.on('custom:event', () => {
      // 处理事件逻辑
    });
  },

  async deactivate(ctx) {
    // 清理资源
    ctx.playground.off('custom:event');
  }
};
// 创建插件工厂函数
export const myPlugin = definePluginCreator(myPluginConfig);
Step 2: 在Playground中注册插件
import { createPlayground } from '@flowgram.ai/core';
import { myPlugin } from './my-plugin';
const playground = createPlayground();
playground.use(myPlugin({ logLevel: 'info' }));
await playground.initialize();
Step 3: 插件间通信
通过依赖注入容器实现插件间松耦合通信:
// 插件A提供服务
bind(MyService).to(MyServiceImpl).inSingletonScope();
// 插件B使用服务
const service = container.get(MyService);
四、依赖注入:Inversify容器的配置与使用 4.1 容器创建与模块配置
@flowgram.ai/core使用InversifyJS实现依赖注入Ideogram api,通过createContainer函数创建容器:
import { createContainer } from '@flowgram.ai/core';
import { interfaces } from 'inversify';
// 创建容器并配置模块
const container = createContainer([
  (bind: interfaces.Bind) => {
    // 绑定服务
    bind(StorageService).to(LocalStorageService).inSingletonScope();

    // 绑定常量
    bind('API_URL').toConstantValue('https://api.flowgram.ai');

    // 绑定工厂
    bind<interfaces.Factory>('EditorFactory')
      .toFactory((context) => {
        return () => {
          const editor = new Editor(context.container.get(StorageService));
          return editor;
        };
      });
  }
]);
4.2 装饰器与元数据
利用reflect-metadata实现类型反射,简化依赖注入:
import { injectable, inject } from 'inversify';
@injectable()
class EditorService {
  constructor(
    @inject(StorageService) private storage: StorageService,
    @inject('API_URL') private apiUrl: string
  ) {}

  // 服务方法...
}
五、React集成:Hooks与组件桥接 5.1 核心Hooks速查表
@flowgram.ai/core提供10+React Hooks,简化编辑器状态管理与交互:
Hook名称功能描述参数返回值
usePlayground
获取Playground实例
Playground
useService
获取注入服务
identifier
服务实例
useEntities
监听实体集合变化
registry
实体数组
useListenEvents

监听Playground事件
事件名列表
usePlaygroundContext
获取上下文对象
泛型上下文
表1:核心React Hooks功能对比
5.2 实战:创建编辑器组件
import React, { useEffect } from 'react';
import { usePlayground, useService } from '@flowgram.ai/core';
import { EditorService } from './services';
export const EditorComponent: React.FC = () => {
  const playground = usePlayground();
  const editorService = useService(EditorService);

  useEffect(() => {
    // 组件挂载时初始化编辑器
    editorService.initialize(playground);

    return () => {
      editorService.destroy();
    };
  }, [playground, editorService]);

  return (

      {/* 编辑器UI组件 */}

  );
};
六、最佳实践与性能优化 6.1 内存管理:Disposable接口实现
为防止内存泄漏,所有资源密集型组件应实现Disposable接口:
import { Disposable } from '@flowgram.ai/core';
class DataSource implements Disposable {
  private subscriptions: any[] = [];

  // 清理资源
  dispose(): void {
    this.subscriptions.forEach(sub => sub.unsubscribe());
    this.subscriptions = [];
  }
}
6.2 事件优化:事件委托与节流
在高频交互场景(如拖拽)中优化事件处理:
// 使用节流优化拖拽事件
import { throttle } from 'lodash-es';
import { useListenEvents } from '@flowgram.ai/core';
function DragComponent() {
  const handleDrag = throttle((e) => {
    // 拖拽处理逻辑
  }, 16); // 60fps限制

  useListenEvents({
    'node:drag': handleDrag
  });

  return 拖拽区域;
}
七、总结与未来展望 7.1 核心包价值回顾
@flowgram.ai/core通过依赖注入解耦、插件化扩展、React友好API三大特性,为低代码平台开发提供了坚实基础。其设计亮点包括:
模块化架构:清晰的模块划分降低系统复杂度开闭原则:插件系统支持功能扩展而不修改核心代码类型安全:全面的TypeScript类型定义减少运行时错误 7.2 版本演进路线图
根据当前版本(0.1.8)推测,未来可能的演进方向:
附录:API速查与资源链接 A. 核心类API索引
容器工具
B. 开发资源
【免费下载链接】flowgram.ai
项目地址: https://gitcode.com/gh_mirrors/fl/flowgram.ai
© 版权声明
文章版权归作者所有,未经允许请勿转载。
相关文章


暂无评论...